Showing posts with label furniture makeovers. Show all posts

The Perfect Pair Dresser and Hutch Furniture Makeover

These two pieces met for the first time and were a match made in Heaven! The dresser is from a family friend and the hutch belongs to the buffet I'm using in the foyer. Once these two were painted and attached, they will spend eternity together! 
  

I have had the vision of these two pieces together for years and finally decided it was time to make it happen. The dresser is a vintage solid piece from Drexel with dovetail joints and solid wood construction.  The hutch belongs to the china buffet I'm using in the foyer entrance. Together, they both offer ample storage for our office closet to hold all of my crafting supplies. Here is how they both came together and are a perfect match! 


My friend Wendi introduced me to a brand new furniture paint from General Finishes and I must say it is my new favorite paint.  It goes on smooth as butter and provides a great finish.  I painted each piece of furniture with one coat of primer and then two coats of the General Finishes Milk Paint in Antique White.  
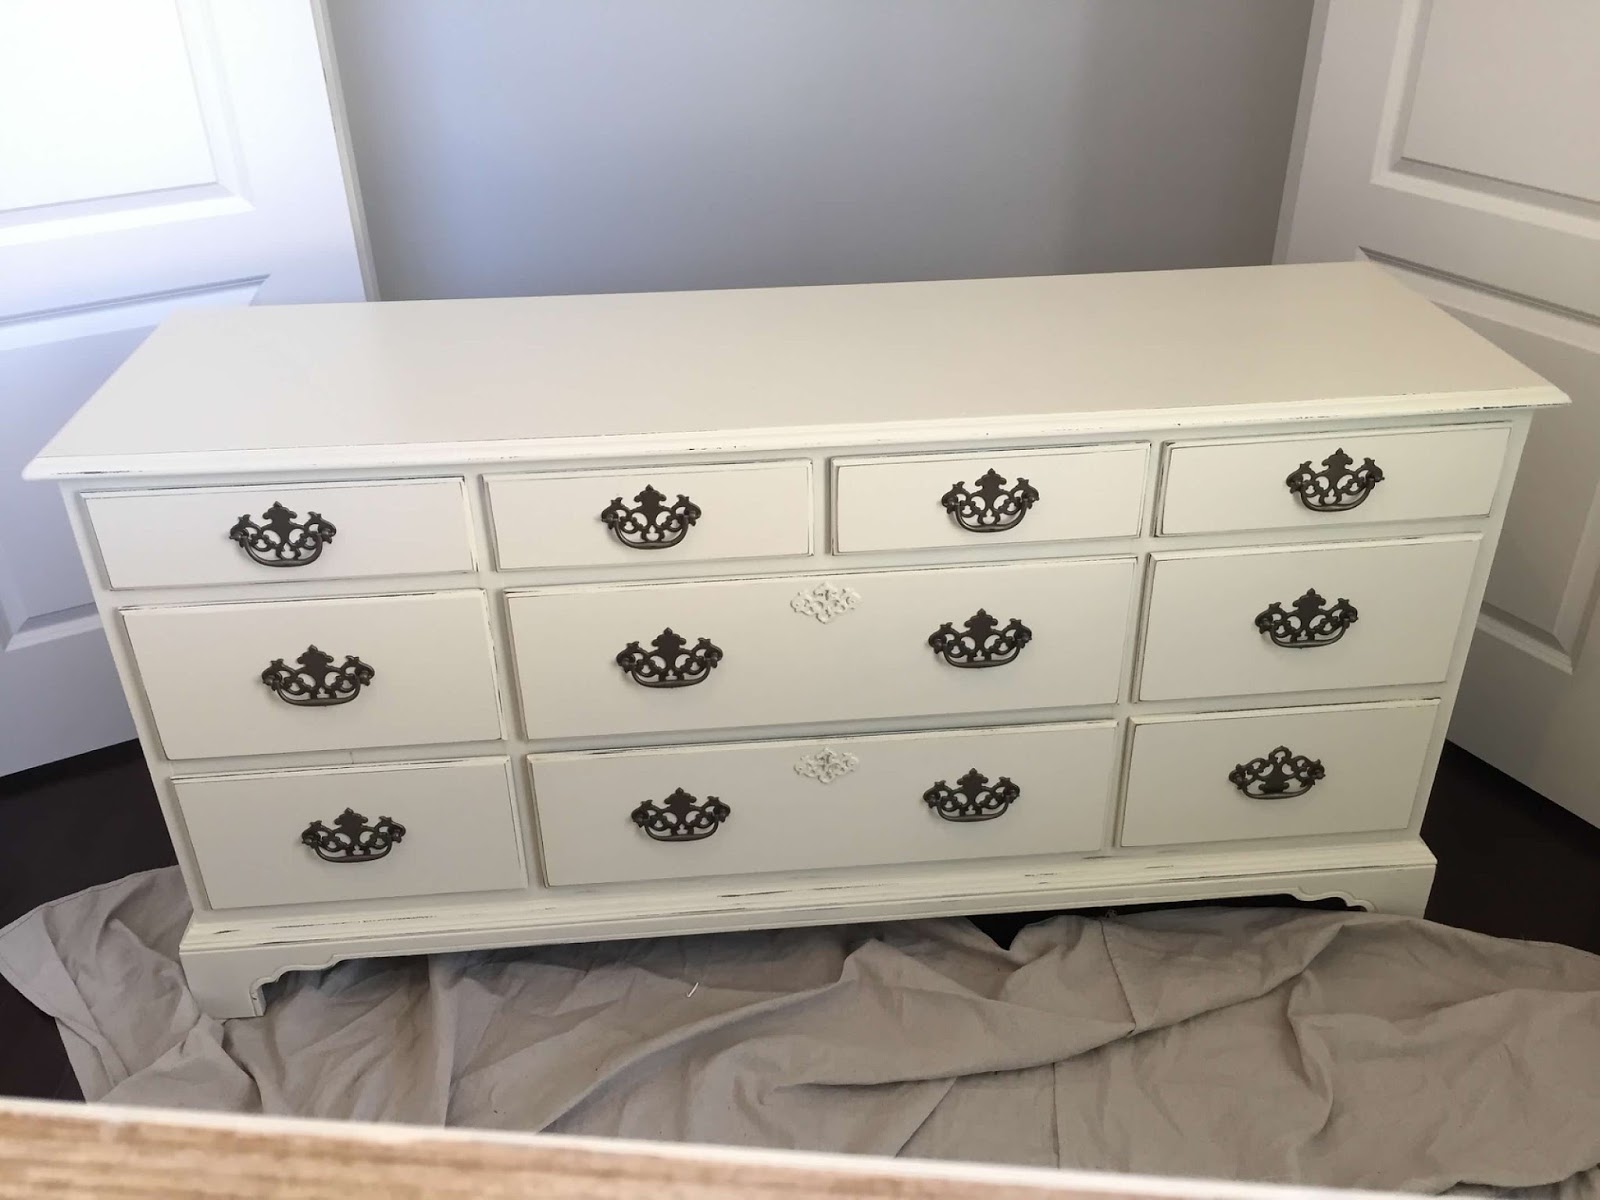


Once finished painting the dresser, I spray painted the handles dark bronze and used my hand sander to distress the edges of the drawers. I wanted a small amount of distressing on this piece to give it a high end look.  
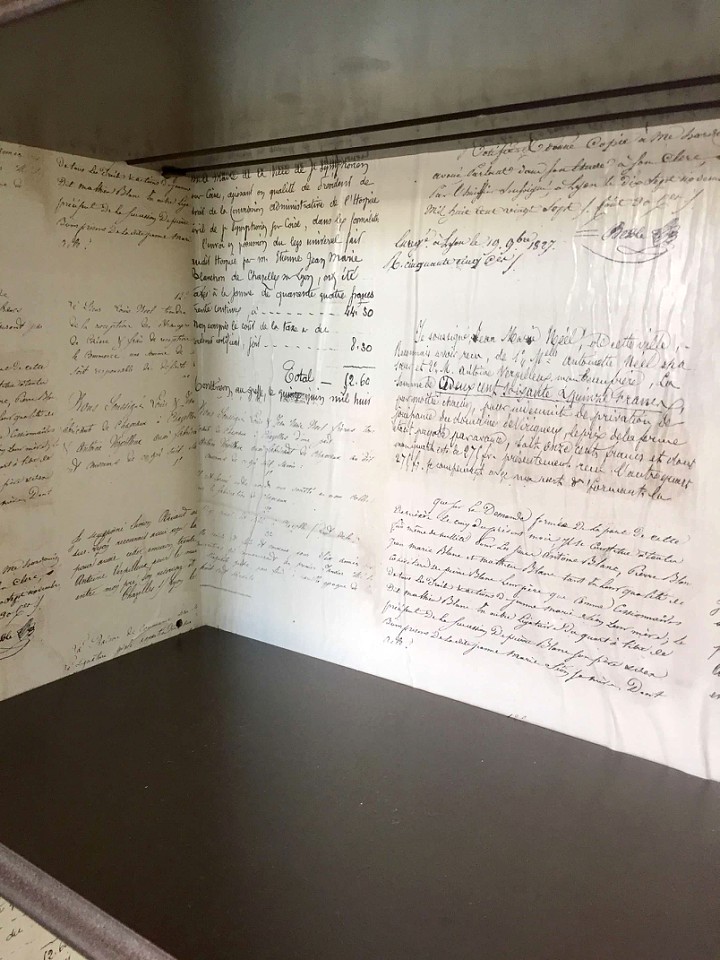
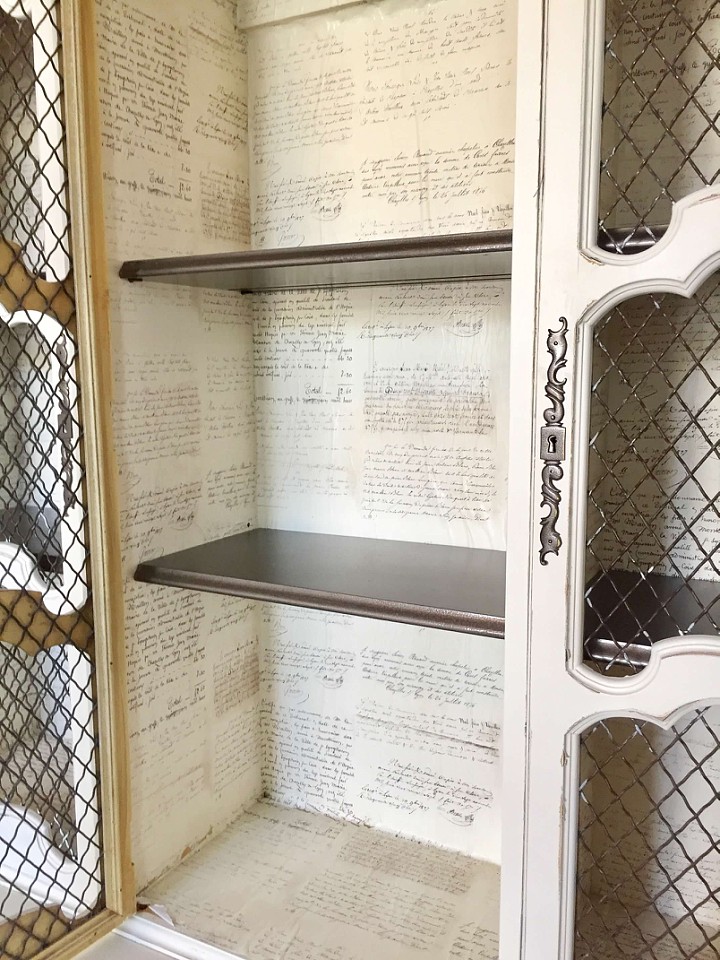
Next, I took some wrapping paper I purchased from Ballard Designs and Mod Podged the entire inside of the upper cabinet.  Since the doors were made with chicken wire, I wanted something you could see and would stand out. I then spray painted the shelves with the same spray paint as I used on the drawer pulls. 


Once both pieces were painted, I used a spray satin Polycrylic over both pieces for protection.  I attached L brackets to the back to secure both pieces and they are now one! 


While I would love to put this piece somewhere out in the house, I really needed it for storage in the office closet and the size is perfect.  When we built our house, I did not get any shelving in any closet and this is not only beautiful, it provides ample space for all of my crafting supplies.  I can always take it out of the closet and use it around the house if needed.  


Start Small- Great Design Takes Time- Enjoy!!

Summer is almost here - Time for an outdoor furniture makeover!

Many of you know I hardly ever purchase anything new. This patio set is no exception and it turned out so inviting and perfect. I first purchased the set from Craigslist and it included the sofa, coffee table, 2 chairs, a rocker and 2 ottomans not pictured. I used Rust Oleum oil rubbed bronze spray paint for the wicker and a 6x9 drop cloth to recover the cushions. I added colorful pillows in the back and some decorative pieces on the side table and coffee table. Now this side porch is almost ready for company. The original patio set was $150 and about $50 for paint and $20 for the paint cloth cushion covers. 

The whole set had good bones, just needed some paint and cushion covers. 


I already had the pillows and decor on the table.  The cushions were covered with a paint drop cloth. 


Added a whiskey barrel from Lowes and some black mulch.  Can't wait to put my feet up and enjoy the warm weather in Florida!

My Very First Furniture Makeover. Vintage Dresser and Mirrors

It all began with a shopping trip to our local Habitat for Humanity Restore with my friend Amanda.  When I shop for pieces I want to makeover I look for the following:

1.  I always FIRST check for dovetail joints in the drawers.  This 
    is a sure sign of a quality piece. 

2.  I try to stay away from furniture that is put together with 
    nails or staples.  

3.  Open drawers to make sure all hardware is attached, slide 
    drawers in and out to make sure tracks are good. 

4.  Check to see if there is a veneer overlay and if is peeling off. 
    If so, stay away! Paint is difficult to adhere to veneer. 

5.  Check for broken off pieces at corners and look for peeling and
    warping at the bottom of furniture.

6.  When drawers and doors are open, smell for smoke.  Even painted, 
    the smoke smell always comes through and the paint won't stick 
    to a piece that has cigarette smoke soot on it.  

6.  Lift it up a little.  Is it heavy or light?  A good heavy piece 
    is a sign of quality workmanship.


Here is the before photo.  I always say: "This one has good bones".  That really means it is a good quality piece of furniture and it will look amazing once it has a paint makeover.


Simple steps to guarantee a great paint job

1.  Lightly sand with 180 grit sanding block or use liquid sander 
    (Klean-Strip Easy Liquid Sander)

2.  Use a chalky finish paint (Annie Sloan, Valspar, or make your
    own with calcium carbonate recipe)

3.  Use a foam cabinet and door roller kit in various sizes (Add
    aluminum foil in paint tray for easy clean up)

4.  Distress edges and raised areas using a small hand sander and 
    sand paper with grit under 100. 

5.  My favorite antique wax hands down is from Annie Sloan.  

6.  You can either use a Polycrylic protective finish or a clear 
    furniture wax for protection.  Again, my favorite is Annie 
    Sloan clear wax. 

7.  Remember that your piece has to cure for 30 days.  In this time
    it can get scratched so be careful! 

Its Friday night so take the weekend to give your favorite piece of furniture the makeover it deserves!  Email me pictures I would love to see your creativity!  lovethyroom@gmail.com   Happy Painting!  


I just loved how this piece came out.  It is now in a little girls bedroom looking beautiful! 

Free Dining Table and Chairs Painted and Distressed to Perfection


I Live in a small community where everyone knows your name!  My friend Angela who owns a property management company offered this solid table and chair set to me for FREE when a tenant moved out and left it.  When I first saw it and felt the quality and pure heaviness, I knew this would be a great piece to refinish.
I painted this piece a few years ago Way before there were so many chalk paint finish products on the market. I am too frugle to pay 40.00 a quart for paint so I made my own. I read countless articles on making your own furniture paint on line and again watched You Tube videos. I used the recipe that calls for flat furniture paint, calcium carbonate and warm water. I didn't sand it, didn't prime it at all. I used a foam cabinet roller and some paint brushes from the Dollar Tree for the base coat. I also added Floetrol to the paint which eliminates brush and roller marks.   I always use paint from the OOPS section at lower where a $40 gallon of paint is about $10 or less.  Then I can mix those if needed to the desired shade. 


After a few layers of paint came the waxing. I have only found one antique wax that I love and that is the antique wax from Annie Sloan. I used the paint brushes from the Dollar Tree and a washcloth to apply wax all over the table and chairs. Then came the fun part of distressing. I used a small sander with a 40 grit sandpaper to distress the edges. I then let it dry and added a satin Polycrylic over the table top for protection. To recover the chairs I purchased the fabric from Joanns and recovered the seat cushions. Now I'm not a upholsterer so I simply stapled the fabric over the existing seat backs and covered the staples with trim.  If you have ever wanted to paint your existing furniture take the chance and do it!  There are so many tutorials and resources on line to get you started! 
                              
You can practice by getting a small end table at your local thrift store!  I wish I could have kept this beauty for my own but at the time we were packing and selling our house and I had to sell it!  I hope the family will enjoy many family dinners for years to come at this beautiful table! 


Furniture Makeover Throwback

     Ahhh... lets go back to my first largest furniture makeover transformation.  I went with my friend Donna to our local Habitat for Humanity Restore in Sanford, FL.  We walked in and she showed me a row of these entertainment units that used to house flat screens, refrigerators and Disney vacation clothes at the Grand Floridian Resort and Spa.  The rooms were getting a makeover and the local Habitat stores were selling everything that came out of each room.  These units were solid cherry wood and boy were they heavy.  They came apart into a top and a bottom piece which made it a little easier for transportation. We started talking and she said she had the idea to turn them into bars. I sat quiet for a minute listening to her thoughts and the idea was born.  The fun part was renting the U-Haul to bring these units back to my garage.  In all we made a UCF one, a Gator one and a Seminole One.  Each one was a long process but man they turned out unique and really are a one of a kind.
The first step was to take off all the hardware, remove the drawers and the drawer handles.  We then used a good primer and paint and it took several layers to get a perfect finish.  Then, we added the mirror to the back and a side hook for a bar towel.  Wooden wine organizers were added in the drawers and the final touch was the UCF sticker.  So much fun and a lot of hard work!

UCF Knights Bar
Wine Drawers
Fridge Behind the Door
                                        
                    
Florida Gators Bar
There are so many furniture makeover ideas on the internet.  Find something you like and give it a try!